We’ve mastered so many safe styles braid wig and style in the last two years – mainly because of necessity. You can find Knotless braid wig easily in the market but here I am going to tell you how to create this style. This style is still unattainable to many is knotless braids. This version with less tension of the adored braids might appear easy to make, but it requires an amount of competence and experience. If you’re not yet mastered your knotless box braids, and you’ve set a goal to master this look, learn from this simple-to-follow guide. Get your comb and your gel, and prepare to go on a hair braiding adventure.
What Are Knotless Box Braids?
Knotless braids look like the traditional three-strand braids that you see in braids in a box. Knotless braid wigs are available in different lengths and sizes. The main distinction is that braids that do not have knots don’t have the knots located at the base of the traditional box braids. The knot is typically used to connect braids. It is possible to create the hairstyle in knotless braids using the fed-in braid method instead. It involves adding tiny amounts of braided hair to your hair, creating braids that have an elongated appearance. This means that your braids won’t be too weighty on the scalp. This could reduce the chance of breaking your hair.
How To Do Knotless Box Braids
Learn how to create a knotless braid masterpiece in a snap, just like a professional braider at the at-home comforts of your home.
Step 1. Prep Your Hair
Before braiding your hair in any style, always start with clean and well-conditioned hair strands. The most important thing is to supply your hair with a long-lasting moisture supply as braids will be in for months.
Step 2. Detangle Your Strands
Then, as with all hair care products, be sure that your hair is free from knots or knots. Then, with a wide-tooth comb, loosen your hair beginning at the ends and moving towards the roots.
Step 3. Divide Your Hair Into Sections
Splitting the braiding process can make the entire process appear less daunting. Break your hair up into four equally sized sections to make it easier. Utilize hair ties or claw clips to tie three sections in the right direction as you begin the next.
Step 4. Add Your Hair Cream
After that, you’ll need to provide your hair with some extra moisture to keep it in good condition during the wear of your braids without knots. Finally, apply moisturizing hair cream or more leave-in conditioner on your hair and be ensure to shower your hair ends some love, too.
Step 5. Perfect Your Parts
Utilizing a rat tail combing tool, you can create your components. You can choose between box or triangle pieces — however, you must decide before beginning. By creating precise parts, you avoid borrowing hair from the outside of every braid and make your knotless braids appear more polished appearance in the final.
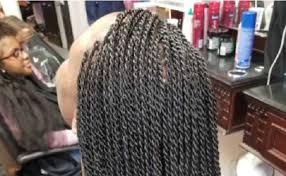
Step 6. Craft Your Knotless Braids
After choosing your pieces and determining the length of your braids, create a small section and apply a hair gel. Next, cut your section into three sections and begin braiding your hair. Once you’ve got your three braided links (or as low as appropriate for the length you’d like in your braids), add braiding hair and work to the bottom. When you’ve reached the end, add a few drops of gel to hold it.
Step 7. Use Holding Spray For Extra Staying Power
When the braid is completed After the braid is completed, spray the braid with a holding spray. Spray your braid from the roots up to the ends. This will aid your hair to connect to synthetic hair and stop your braid from unravelling as you work. This additional step adds an extra step and time to the procedure, but it will be the essential factor in how long your knot-free box braids remain in place.
Step 8. Repeat In Each Section
Repeat the process for the remaining hair sections until you’ve got a hair full of knotless braids.
How To Maintain Your Knotless Box Braids
Congrats on your new set of braids with no knots! Follow our three tips to maintain your hair looking great over weeks (while you protect your hair’s natural locks too).
1. Oil Your Scalp Every Week
Although you’ve done your best to supply the hair with moisture over time, your hair will require more water. So utilising your preferred hair oil apply oil to your hair every week to help keep your hair and scalp well-hydrated.
2. Protect Your Braids At Night, No Exceptions
Though you may think wearing a protective style will mean less work; however, it is essential to ensure that it is protected during the night to ensure it stays for a long time. The act of covering your braids with a silk bonnet or scarf will protect your hair from frizz while keeping your braids in place. After all that effort, you shouldn’t like to see your braids that are knot-free fall apart.
3. Take Them Down When It’s Time
As gorgeous as knotless braids are, after six weeks, you’re ready to cut your braids off. If you let them hang too long, you’ll risk your hair forming a mat at the root and causing broken hair when you try to unravel it. Therefore, be cautious and remove your braids at the right moment.